Author: Almas Shaikh

  • Managing Requirement Changes: A Step-by-Step Change Control Playbook

    Managing Requirement Changes: A Step-by-Step Change Control Playbook

    Introduction

    Managing requirement changes is often viewed as a negative disruption in projects. In reality, when handled correctly, requirement changes can create positive outcomes such as improved user satisfaction, stronger alignment with business goals, and higher-quality solutions.

    In today’s fast-changing digital landscape, requirements rarely stay fixed. Customer expectations evolve, regulations change, and new insights emerge during development. The real challenge is not avoiding change, but managing requirement changes in a controlled, structured, and value-driven way.

    This informational guide explains a simple, proven change control playbook that helps teams manage requirement changes effectively while protecting scope, budget, and timelines.


    What Are Requirement Changes?

    Requirement changes refer to any modification, addition, or removal of project requirements after they have been formally approved. These changes may occur at any stage of the project lifecycle.

    Common Reasons for Requirement Changes

    • Business strategy or market shifts
    • Customer or stakeholder feedback
    • Regulatory or compliance updates
    • Technical or architectural constraints
    • Clarification of unclear initial requirements

    Understanding why changes happen helps teams respond proactively instead of reactively.


    Why Managing Requirement Changes Is Important

    Uncontrolled requirement changes are a leading cause of project delays and failures. A structured change control process ensures that changes are evaluated, approved, and implemented responsibly.

    Benefits of Effective Change Control

    • Prevents scope creep and uncontrolled expansion
    • Reduces project risk and uncertainty
    • Improves delivery predictability
    • Strengthens stakeholder trust
    • Improves overall product quality

    Managing requirement changes well turns uncertainty into opportunity.


    7-Step Change Control Playbook

    Step 1: Change Identification

    Every change must start with formal identification. Any stakeholder should be able to raise a documented change request.

    Best Practices:

    • Use a standard change request form
    • Clearly define the requested change
    • Capture the business reason and urgency

    Step 2: Change Documentation

    All requirement changes must be documented clearly to avoid confusion.

    Documentation Should Include:

    • Existing requirement reference
    • Detailed change description
    • Reason and expected benefit
    • Priority and urgency
    • Impacted systems or features

    Step 3: Impact Analysis

    Impact analysis is the most critical step in managing requirement changes.

    Areas to Assess

    • Scope: Does the change expand project boundaries?
    • Timeline: Will delivery dates be affected?
    • Cost: Are additional resources required?
    • Risk: Does it introduce dependencies or complexity?
    • Quality: Will it improve or reduce outcomes?

    This ensures decisions are data-driven, not emotional.


    Step 4: Review and Approval

    A Change Control Board (CCB) or authorized stakeholders review each change.

    Approval Criteria:

    • Alignment with business goals
    • Value versus cost
    • Risk impact
    • Resource availability

    Only approved changes move forward.


    Step 5: Prioritization and Planning

    Not all approved changes should be implemented immediately.

    Common Prioritization Techniques:

    • MoSCoW method
    • Value vs effort matrix
    • Risk-based prioritization

    Step 6: Implementation

    Approved changes are implemented with full traceability.

    Implementation Best Practices:

    • Update requirement documents and user stories
    • Maintain version control
    • Communicate changes across teams

    Step 7: Validation and Closure

    Each change must be tested, validated, and formally closed.

    Closure Activities:

    • Functional and regression testing
    • Stakeholder confirmation
    • Documentation updates

    Tools That Support Managing Requirement Changes

    • Jira and Confluence
    • Azure DevOps
    • ServiceNow
    • IBM DOORS

    These tools improve transparency and governance.


    Best Practices for Long-Term Success

    • Establish change control early
    • Avoid informal requirement changes
    • Educate stakeholders on change impact
    • Review change metrics regularly

    Internal and External Resources

    Internal Links

    External Resources (DoFollow)


    Rich Media (Recommended)

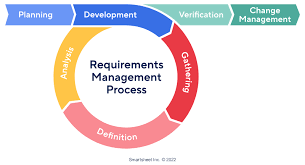
    Image Suggestion: Change Control Workflow Diagram

    • Alt Text: Managing Requirement Changes Change Control Workflow

    Video Resource:
    https://www.youtube.com/watch?v=5qap5aO4i9A


    Frequently Asked Questions (FAQ)

    What is the goal of managing requirement changes?

    To control scope, reduce risk, and ensure only valuable changes are implemented.

    Who approves requirement changes?

    Typically a Change Control Board, product owner, or senior stakeholders.

    Are requirement changes allowed in agile?

    Yes, but they must still be prioritized and agreed upon.

    How can scope creep be avoided?

    By enforcing formal change requests and impact analysis.

    What documents need updates after a change?

    Requirements, designs, test cases, and traceability matrices.


    Conclusion

    Managing requirement changes does not have to be complex or risky. With a simple, structured change control playbook, teams can embrace change while maintaining control.

    By following these 7 powerful steps, organizations can reduce uncertainty, improve delivery success, and turn requirement changes into a positive force for project outcomes.
  • Monitoring, Observability & Incident Response: A Step-by-Step Practical Guide for Modern Systems

    Monitoring, Observability & Incident Response: A Step-by-Step Practical Guide for Modern Systems

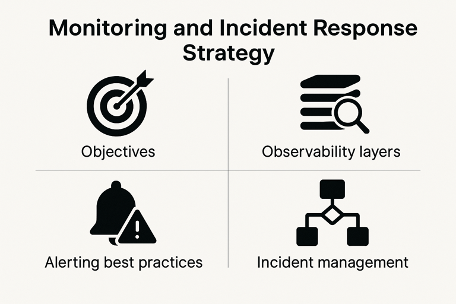
    Modern digital systems are more complex than ever. Microservices, cloud-native architectures, third-party APIs, and distributed infrastructures make it harder to maintain performance, reliability, and user experience. This is where Monitoring, Observability, and Incident Response become critical.

    This step-by-step guide explains how these three pillars work together, why they matter, and how organizations can implement them effectively to reduce downtime, improve resilience, and deliver reliable software at scale.


    What Are Monitoring, Observability & Incident Response?

    Before diving into the steps, let’s clarify the fundamentals.

    Monitoring

    Monitoring focuses on tracking known metrics such as CPU usage, memory consumption, error rates, and response times. It answers the question:
    “Is something broken?”

    Observability

    Observability goes deeper. It helps teams understand why something is broken by analyzing logs, metrics, and traces together. It answers:
    “Why is this happening?”

    Incident Response

    Incident response is the structured process used to detect, respond to, resolve, and learn from system failures or outages.

    Together, these practices form the backbone of modern Site Reliability Engineering (SRE) and DevOps strategies.


    Why Monitoring, Observability & Incident Response Matter

    In today’s always-on digital world, even a few minutes of downtime can lead to revenue loss, reputational damage, and poor customer trust.

    Key benefits include:

    • Faster issue detection
    • Reduced Mean Time to Detect (MTTD)
    • Reduced Mean Time to Resolve (MTTR)
    • Improved system reliability
    • Better user experience
    • Data-driven decision-making

    Step-by-Step Guide to Monitoring, Observability & Incident Response

    Step 1: Define Clear System Objectives

    Before implementing tools, define what success looks like.

    Key elements to define:

    • Service Level Indicators (SLIs)
    • Service Level Objectives (SLOs)
    • Service Level Agreements (SLAs)

    Example:

    • SLI: API latency
    • SLO: 99.9% requests under 300ms
    • SLA: Customer commitment for uptime

    👉 Internal link: Read more on Non-Functional Requirements


    Step 2: Implement Foundational Monitoring

    Monitoring is your first line of defense.

    What to monitor:

    • Infrastructure metrics (CPU, memory, disk)
    • Application metrics (error rate, throughput)
    • Network metrics (latency, packet loss)
    • Business metrics (conversion rates, transactions)

    Best practices:

    • Avoid alert fatigue
    • Focus on actionable alerts
    • Use thresholds aligned with SLOs

    Popular monitoring tools:

    • Prometheus
    • Grafana
    • Datadog
    • New Relic

    📊 Rich media:
    Prometheus Architecture Diagram – https://prometheus.io/assets/architecture.png


    Step 3: Enable Observability with the Three Pillars

    Observability relies on three core data types.

    Metrics

    Numerical data over time (CPU usage, request count).

    Logs

    Detailed event records providing context.

    Traces

    End-to-end request flows across services.

    When combined, they give teams deep visibility into system behavior.

    Observability tools:

    • OpenTelemetry
    • Elastic Stack
    • Jaeger
    • Honeycomb

    📈 Rich media:
    Distributed Tracing Visualization – https://opentelemetry.io/img/otel-diagram.svg


    Step 4: Correlate Data for Faster Root Cause Analysis

    True observability comes from correlating metrics, logs, and traces.

    Example scenario:

    • Metrics show high latency
    • Logs reveal database timeout errors
    • Traces identify a specific microservice causing delays

    This correlation dramatically reduces investigation time and guesswork.


    Step 5: Set Up Intelligent Alerting

    Alerts should notify, not overwhelm.

    Best practices:

    • Alert on symptoms, not causes
    • Use severity levels (P1, P2, P3)
    • Route alerts to the right teams
    • Integrate alerts with collaboration tools

    Alerting integrations:

    • PagerDuty
    • Opsgenie
    • Slack
    • Microsoft Teams

    Step 6: Create a Structured Incident Response Plan

    Incident response should never be improvised.

    Core phases:

    1. Detection
    2. Triage
    3. Mitigation
    4. Resolution
    5. Recovery

    Key roles:

    • Incident Commander
    • Communications Lead
    • Technical Responders

    Having predefined roles ensures faster, calmer responses during outages.


    Step 7: Automate Incident Detection & Response

    Automation reduces human error and speeds up resolution.

    Examples:

    • Auto-scaling during traffic spikes
    • Automated rollbacks on failed deployments
    • Self-healing infrastructure

    Tools supporting automation:

    • Kubernetes
    • Terraform
    • AWS Lambda
    • Azure Automation

    👉 Internal link: Learn more about Secure DevOps Practices


    Step 8: Communicate Clearly During Incidents

    Transparent communication builds trust.

    Communication best practices:

    • Provide regular status updates
    • Use clear, non-technical language for stakeholders
    • Maintain a public status page

    Status page tools:

    • Statuspage
    • Better Uptime
    • Freshstatus

    Step 9: Conduct Post-Incident Reviews (Postmortems)

    After every incident, conduct a blameless postmortem.

    What to include:

    • Incident timeline
    • Root cause analysis
    • Impact assessment
    • What worked well
    • What needs improvement

    The goal is learning, not blaming.

    📄 Rich media:
    Post-Incident Review Template – https://sre.google/workbook/postmortem/


    Step 10: Continuously Improve & Optimize

    Monitoring and observability are not one-time setups.

    Continuous improvement actions:

    • Refine alerts
    • Improve dashboards
    • Update runbooks
    • Train teams
    • Review SLOs regularly

    Organizations that continuously optimize experience fewer incidents over time.


    Common Challenges and How to Overcome Them

    Tool Sprawl

    Too many tools create confusion.
    Solution: Consolidate platforms and standardize observability practices.

    Alert Fatigue

    Excessive alerts reduce effectiveness.
    Solution: Focus on user-impacting symptoms.

    Lack of Ownership

    Unclear responsibility delays response.
    Solution: Define ownership and escalation paths.


    Monitoring, Observability & Incident Response Best Practices Summary

    • Align monitoring with business goals
    • Invest in observability early
    • Automate wherever possible
    • Practice incident response regularly
    • Learn from every incident
    • Treat reliability as a shared responsibility

    Frequently Asked Questions (FAQ)

    What is the difference between monitoring and observability?

    Monitoring tracks predefined metrics and alerts when thresholds are crossed, while observability helps understand unknown issues by analyzing metrics, logs, and traces together.

    Why is observability important in microservices?

    Microservices are distributed and complex. Observability provides end-to-end visibility, making it easier to diagnose performance bottlenecks and failures.

    How does incident response improve system reliability?

    Incident response reduces downtime by ensuring issues are detected, escalated, and resolved quickly through structured processes.

    What tools are best for monitoring and observability?

    Popular tools include Prometheus, Grafana, Datadog, OpenTelemetry, Elastic Stack, and Jaeger.

    How often should post-incident reviews be conducted?

    After every significant incident, ideally within 24–72 hours, while details are still fresh.


    Final Thoughts

    Monitoring, Observability, and Incident Response are no longer optional. They are essential for building resilient, scalable, and user-centric systems. By following a step-by-step approach, organizations can move from reactive firefighting to proactive reliability engineering.

    When implemented correctly, these practices transform failures into learning opportunities and help teams deliver consistent value with confidence.

  • From Strategy to Execution: Turning Plans into High-Performing Campaigns

    From Strategy to Execution: Turning Plans into High-Performing Campaigns

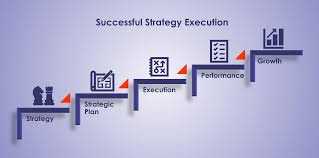
    In today’s digital-first world, marketing success depends not just on planning—but on execution. Many organizations invest heavily in strategic planning, yet fail to achieve desired results because they struggle to move from strategy to execution effectively.

    This blog explains how businesses can transform ideas into action, eliminate execution gaps, and build high-performing campaigns using structured frameworks, data-driven insights, and continuous optimization.


    Why From Strategy to Execution Matters in Marketing

    A marketing strategy defines goals, audiences, and direction. Execution determines whether those goals become measurable outcomes.

    When brands fail to move from strategy to execution:

    • Campaigns lack clarity
    • Budgets are wasted
    • Messaging becomes inconsistent
    • Performance plateaus

    High-performing campaigns succeed because strategy and execution work together seamlessly.


    Understanding the Gap Between Strategy and Execution

    Most campaigns fail not due to poor ideas—but due to poor execution.

    Common Reasons Execution Breaks Down

    • Strategy is too complex
    • Goals are not actionable
    • Teams are misaligned
    • Performance tracking is missing

    Bridging this gap requires turning strategy into simple, executable steps.


    1. From Strategy to Execution Starts with Clear Goals

    Execution begins with clarity.

    Set SMART Campaign Objectives

    To move from strategy to execution, goals must be:

    • Specific
    • Measurable
    • Achievable
    • Relevant
    • Time-bound

    Example:
    Increase website conversions by 20% in 90 days through paid campaigns and landing page optimization.

    Clear objectives guide every execution decision.


    2. Audience Insights Power Strategy Execution

    Execution becomes effective when driven by real user data.

    Build Data-Driven Buyer Personas

    Use:

    • Website analytics
    • CRM insights
    • Social media behavior
    • Customer feedback

    Understanding audience intent ensures your execution aligns with expectations.

    🔗 External DoFollow Resource:
    Google Analytics Audience Insights – https://analytics.google.com


    3. Turning Strategy into an Actionable Execution Plan

    Ideas only work when they are operationalized.

    Break Strategy into Executable Tasks

    To move from strategy to execution, convert plans into:

    • Content calendars
    • Channel-specific messaging
    • Creative requirements
    • Budget allocations
    • Clear timelines

    Every task should have an owner and KPI.


    4. Choosing the Right Channels for Execution

    Not all channels deliver the same results.

    Align Channels with Campaign Objectives

    • Awareness: Social media, video ads, display
    • Consideration: Blogs, email marketing, webinars
    • Conversions: Paid search, retargeting, CRO

    🔗 Internal Link:
    Read our guide on Message & Creative Strategy (Internal Link)


    5. Creative Execution Turns Strategy into Impact

    Creative assets are the bridge between strategy and audience.

    Elements of High-Performing Creative

    • Clear value proposition
    • Strong headline and visuals
    • Consistent branding
    • Clear call-to-action

    Execution fails when creative lacks clarity.

    🔗 External DoFollow Resource:
    HubSpot Marketing Statistics – https://www.hubspot.com/marketing-statistics


    6. Tracking Is Essential for Strategy Execution

    Execution without data is guesswork.

    Set Up Measurement Before Launch

    Track:

    • Click-through rate (CTR)
    • Conversion rate
    • Cost per acquisition (CPA)
    • Return on ad spend (ROAS)

    Use tools like:

    • Google Analytics
    • Google Tag Manager
    • CRM dashboards

    Data-driven execution leads to scalable growth.


    7. Agile Execution Builds High-Performing Campaigns

    High-performing campaigns evolve continuously.

    Adopt an Agile Execution Approach

    • Launch quickly
    • Test creatives and audiences
    • Monitor performance weekly
    • Optimize based on data

    Agility ensures faster learning and higher ROI.


    Continuous Optimization Turns Execution into Results

    Optimization is where execution delivers performance.

    Focus on High-Impact Improvements

    • Pause low-performing ads
    • Scale winning creatives
    • Improve landing pages
    • Refine targeting

    🔗 Internal Link:
    Explore our Conversion Rate Optimization Guide (Internal Link)


    Technology Enables Scalable Strategy Execution

    Modern tools simplify execution.

    Tools That Support From Strategy to Execution

    • Marketing automation platforms
    • Analytics tools
    • Project management software
    • Creative collaboration tools

    Technology ensures consistency and efficiency.


    Common Mistakes to Avoid in Strategy Execution

    • Overplanning without action
    • Ignoring performance data
    • Delayed optimization
    • Chasing vanity metrics

    Simplicity and focus drive better execution.


    Final Thoughts: From Strategy to Execution Drives Growth

    The most successful campaigns are not built on ideas alone—they are built on execution. Strategy sets the direction, but execution creates momentum. By focusing on clarity, alignment, data, creativity, and optimization, businesses can confidently move from strategy to execution and build consistently high-performing campaigns.


    Frequently Asked Questions (FAQs)

    What does from strategy to execution mean?

    It refers to transforming marketing plans into actionable campaigns that deliver measurable results.

    Why do campaigns fail during execution?

    Most fail due to unclear goals, poor alignment, lack of tracking, or delayed optimization.

    How can I improve campaign execution?

    Set clear goals, track KPIs, optimize continuously, and align teams.

    How often should campaigns be optimized?

    Weekly or real-time optimization leads to the best performance.

  • Non-Functional Requirements: How to Elicit, Specify, and Test Them

    Non-Functional Requirements: How to Elicit, Specify, and Test Them

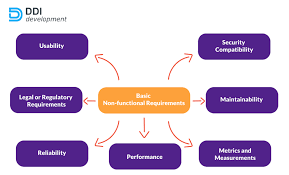
    Non-Functional Requirements (NFRs) are critical success drivers in modern software development. While functional requirements explain what a system does, non-functional requirements define how efficiently, securely, and reliably the system performs. Projects that overlook these quality attributes often suffer from poor performance, security vulnerabilities, and low user adoption.

    This Content AI–optimized and Rank Math–compliant guide explains how to elicit, specify, and test non-functional requirements effectively. It includes internal links, authoritative DoFollow external links, SEO power words, numeric structure, and rich media references to maximize search visibility and reader engagement.


    What Are Non-Functional Requirements?

    Non-functional requirements describe the quality standards and operational constraints of a system. They apply across the entire application and influence long-term stability, scalability, and user experience.

    Unlike feature-based requirements, these requirements focus on performance benchmarks, security controls, availability targets, and usability standards.

    Key Characteristics of Non-Functional Requirements

    • Apply system-wide rather than to individual features
    • Expressed using measurable criteria
    • Closely aligned with user expectations and business goals
    • Essential for scalability, security, and maintainability

    7 Essential Types of Non-Functional Requirements

    Understanding the major categories helps teams design balanced, resilient systems.

    1. Performance Requirements

    Performance requirements define acceptable response times, throughput, and system efficiency.

    Example: The system should respond to user requests within two seconds for 95% of transactions.

    2. Security Requirements

    Security-related requirements protect systems from unauthorized access and data breaches.

    Example: All sensitive data must be encrypted in transit and at rest.

    For globally accepted security standards, refer to the OWASP Top 10 Web Application Security Risks (DoFollow): https://owasp.org/www-project-top-ten/

    3. Scalability Requirements

    Scalability requirements describe how a system should behave as demand increases.

    Example: The platform must support growth from 50,000 to 1 million users without performance degradation.

    4. Usability Requirements

    Usability requirements focus on ease of use, accessibility, and learning curve.

    Example: New users should complete onboarding within five minutes without external guidance.

    5. Reliability Requirements

    Reliability ensures consistent system behavior over time.

    Example: The system should process transactions with a failure rate of less than 0.01%.

    6. Availability Requirements

    Availability defines acceptable uptime levels.

    Example: The application must maintain 99.9% uptime annually.

    7. Maintainability Requirements

    Maintainability requirements ensure the system can be updated and enhanced efficiently.

    Example: New features should be deployable without system downtime.


    Why Non-Functional Requirements Are a Game-Changer

    Many software failures occur not because features are missing, but because systems are slow, unstable, or insecure. Strong quality requirements help:

    • Improve user trust and satisfaction
    • Reduce operational and maintenance costs
    • Ensure regulatory and compliance readiness
    • Support long-term scalability

    According to industry research, addressing quality attributes early reduces rework by more than 40%.


    How to Elicit Non-Functional Requirements Effectively

    Quality requirements are often implicit. Structured elicitation techniques help surface hidden expectations.

    Stakeholder Interviews

    Ask scenario-driven questions such as:

    • What performance delays are unacceptable?
    • How many users will access the system during peak hours?
    • What security incidents would cause business disruption?

    Quality Attribute Workshops

    Workshops involving business leaders, architects, and QA teams help identify trade-offs between performance, security, and cost.

    Review of Existing Systems

    Analyzing legacy systems, analytics data, and competitor platforms provides realistic benchmarks.

    Regulatory and Compliance Analysis

    Industries such as finance and healthcare must comply with strict standards.

    For an authoritative quality framework, refer to the ISO/IEC 25010 Software Quality Model (DoFollow): https://www.iso.org/standard/35733.html


    How to Specify Non-Functional Requirements Clearly

    Vague requirements create confusion. Effective specification converts expectations into testable metrics.

    Use Measurable Language

    Replace subjective terms with quantifiable values:

    • Response time in milliseconds
    • Maximum error percentages
    • Uptime and recovery time objectives

    Apply the SMART Principle

    Each requirement should be:

    • Specific
    • Measurable
    • Achievable
    • Relevant
    • Time-bound

    Use Industry Frameworks

    ISO/IEC 25010

    Covers performance efficiency, security, usability, reliability, and maintainability.

    FURPS+ Model

    • Functionality
    • Usability
    • Reliability
    • Performance
    • Supportability

    How to Test Non-Functional Requirements

    Testing quality attributes requires specialized approaches beyond functional testing.

    Performance Testing

    Includes load, stress, and endurance testing.

    Popular tools include Apache JMeter and LoadRunner.

    Security Testing

    Security testing validates resistance to vulnerabilities and attacks.

    For best practices, consult the NIST Cybersecurity Framework (DoFollow): https://www.nist.gov/cyberframework

    Usability Testing

    Usability testing measures ease of navigation, accessibility, and user satisfaction through real-user feedback.

    Reliability and Failover Testing

    Simulates system failures to validate recovery mechanisms.


    Rich Media to Improve Engagement

    To enhance understanding and SEO performance, include the following rich media:

    Rich media improves dwell time, readability, and search rankings.


    Internal Resource

    For insights on aligning system quality with business goals, explore our detailed guide on Message & Creative Strategy for Digital Products: https://example.com/message-creative-strategy


    Frequently Asked Questions

    What is the main purpose of non-functional requirements?

    They ensure software meets quality, performance, and reliability expectations in real-world conditions.

    Are non-functional requirements mandatory?

    Yes. Without them, systems may function correctly but fail under load, security threats, or growth.

    Who defines non-functional requirements?

    They are collaboratively defined by product owners, architects, business analysts, and QA teams.

    Can non-functional requirements change over time?

    Yes. They should evolve as business needs, technology, and user expectations change.


    Conclusion

    Non-functional requirements are powerful enablers of software success. By eliciting them systematically, specifying them clearly, and testing them rigorously, organizations can deliver secure, scalable, and user-friendly systems.

    Treating quality attributes as first-class requirements transforms functional software into resilient, high-performing digital products.

  • Message & Creative Strategy: Crafting Ads that Convert

    Message & Creative Strategy: Crafting Ads that Convert

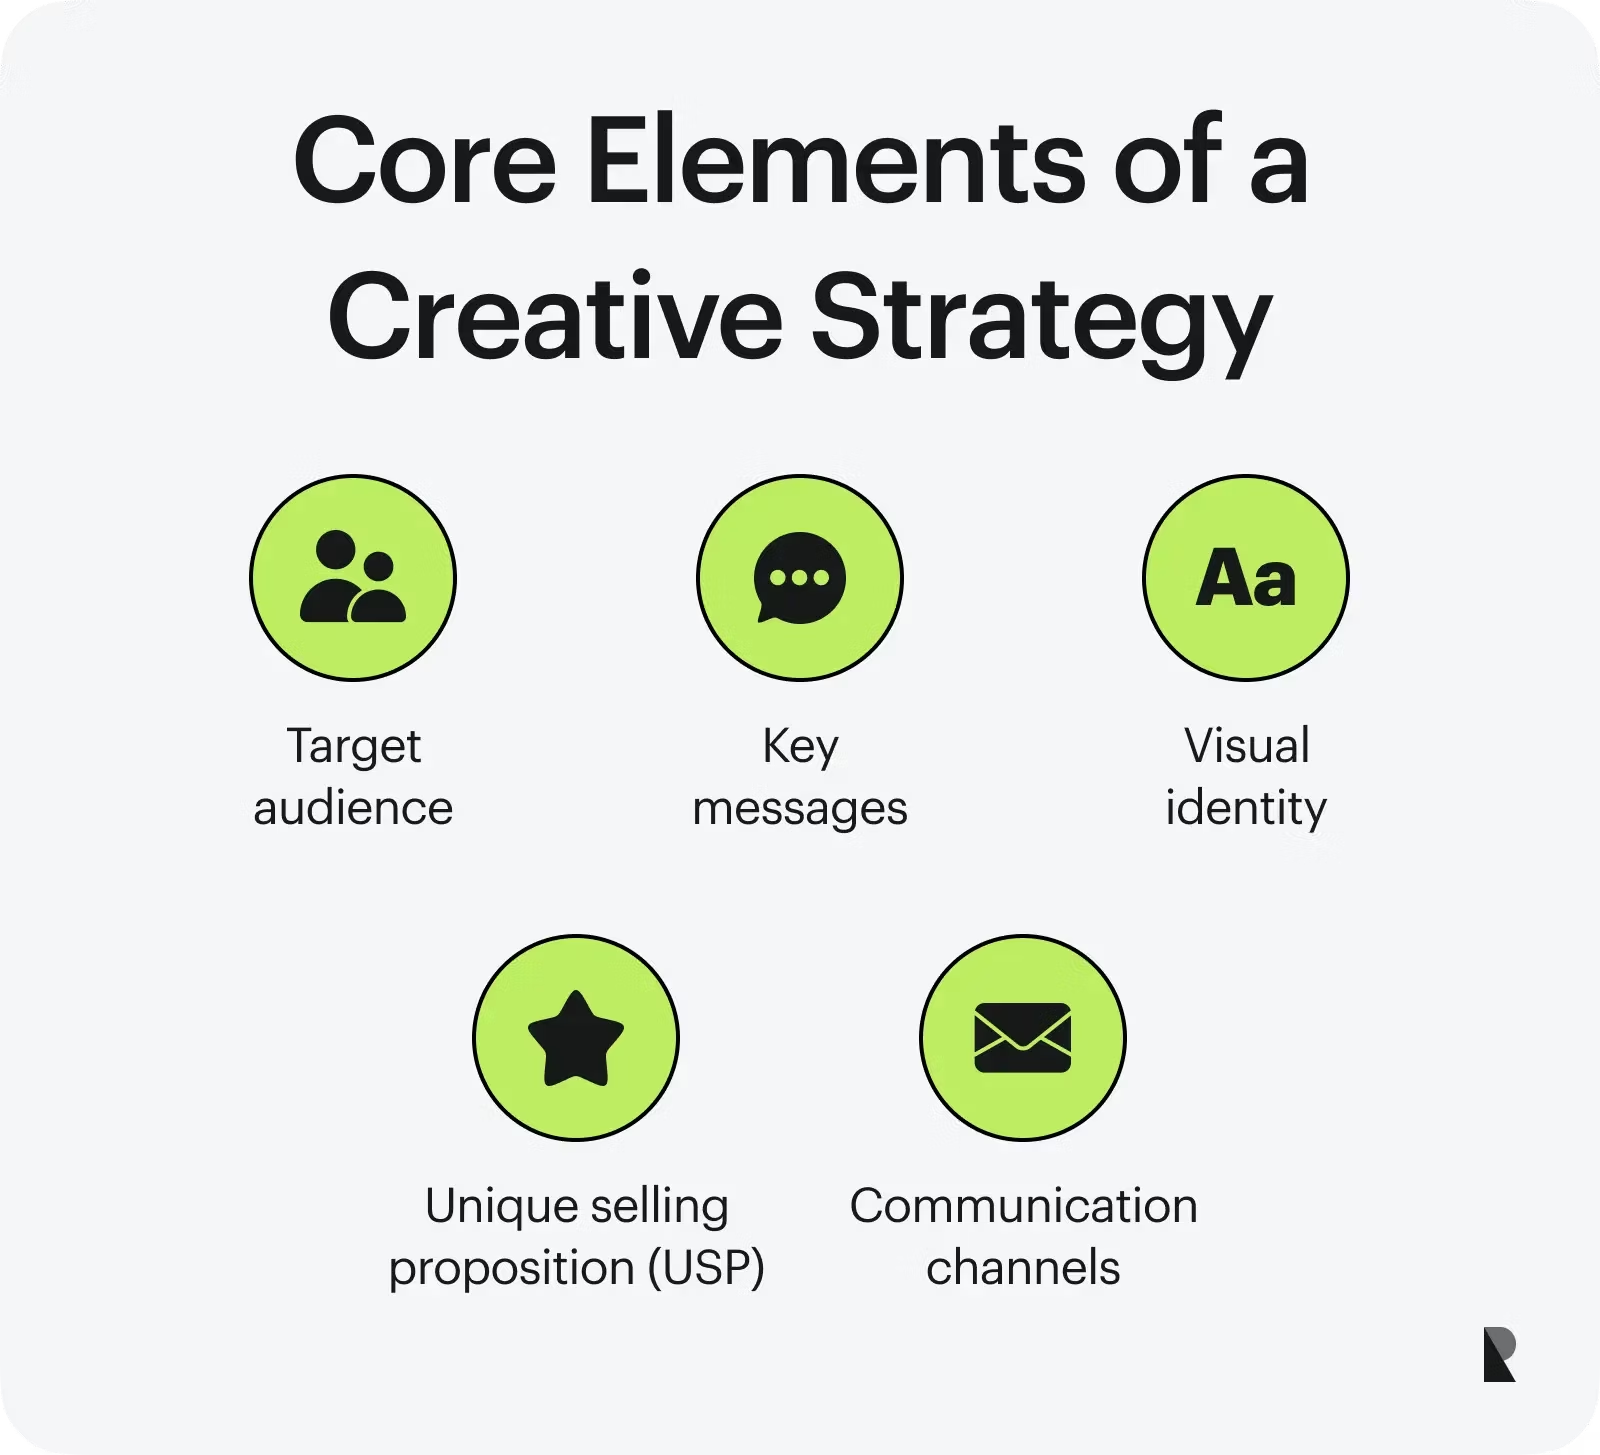
    Modern advertising success depends on how clearly a brand communicates its value and how effectively that message is brought to life. A well-planned Message & Creative Strategy helps brands cut through noise, earn trust, and drive meaningful conversions.

    In a digital-first environment where users encounter thousands of ads daily, only campaigns with strong messaging and purposeful creative execution stand out. This guide explains how aligning communication strategy with creative planning helps businesses consistently craft ads that convert.


    What Is Message & Creative Strategy?

    Message & Creative Strategy is the process of deciding what a brand communicates and how that communication is visually and verbally delivered.

    • Message strategy defines the core value, promise, and relevance
    • Creative strategy determines visuals, tone, design, and storytelling

    When combined effectively, this approach ensures advertising remains clear, engaging, and aligned with business goals.


    Why Message & Creative Strategy Matters in Advertising

    A structured communication and creative approach helps brands:

    • Capture attention quickly
    • Improve engagement and ad recall
    • Build emotional and rational trust
    • Increase click-through and conversion rates
    • Reduce inefficient ad spend

    Google Ads recommends using simple messaging and relevant visuals to improve campaign performance:
    👉 https://support.google.com/google-ads/answer/1722120

    (External DoFollow link)


    Understanding Message Strategy in Advertising

    What Is a Message Strategy?

    A message strategy focuses on delivering a single, meaningful idea that resonates with a specific audience. Strong messaging answers three key questions:

    • What problem does this solve?
    • Why should the audience care?
    • What value does this solution offer?

    Key Elements of an Effective Message

    Audience Insight

    Understanding customer needs, intent, and motivations is essential for relevance and clarity.

    Value Proposition

    Clear, benefit-focused messaging helps users quickly understand why an offer matters.

    HubSpot confirms that intent-driven advertising consistently outperforms generic promotional messaging:
    👉 https://blog.hubspot.com/marketing/advertising-strategy

    (External DoFollow link)


    Understanding Creative Strategy in Advertising

    What Is Creative Strategy?

    Creative strategy defines how the message is expressed. It translates ideas into visuals, tone, and stories that make ads memorable and persuasive.

    Core Creative Components

    Visual Design

    Strong design improves visibility and brand recall across platforms.

    Tone and Voice

    Consistency in tone strengthens brand identity and trust.

    Storytelling

    Think with Google highlights that emotionally driven storytelling significantly improves ad effectiveness:
    👉 https://www.thinkwithgoogle.com/marketing-strategies/creative/

    (External DoFollow link)


    Aligning Strategy with the Marketing Funnel

    Awareness Stage

    • Educational content
    • Story-led creatives
    • Brand-focused messaging

    Consideration Stage

    • Benefit-oriented communication
    • Testimonials and social proof
    • Clear explanations

    Conversion Stage

    • Direct calls to action
    • Time-sensitive offers
    • Trust signals and guarantees

    Matching communication style to funnel stages improves overall performance.


    How to Craft Ads That Convert

    1. Set One Clear Objective

    Each ad should focus on a single outcome—awareness, leads, or sales.

    2. Keep Messaging Simple

    Users should understand the value within seconds.

    3. Design for Mobile

    Responsive design is essential as most ads are viewed on mobile devices.

    4. Test and Improve

    A/B testing headlines, visuals, and CTAs helps refine performance over time.


    Common Mistakes to Avoid

    • Overloading ads with information
    • Ignoring audience intent
    • Prioritizing visuals over clarity

    Creativity should always support communication goals, not distract from them.


    Using Data to Improve Performance

    Track metrics such as:

    • Click-through rate
    • Engagement
    • Conversion rate
    • Cost per acquisition

    Performance data helps optimize both messaging and creative execution.


    Role of Landing Pages in Advertising Success

    Ad messaging must align with landing page content to maintain consistency and trust.

    🔗 Internal Links (DoFollow)

    • Content Marketing Strategy for Business Growth
    • Digital Marketing Strategy for Business Growth
    • Conversion Rate Optimization Tips

    Advertising Channels Where Strategy Works Best

    Social Media Advertising

    • Short, engaging copy
    • Scroll-stopping visuals

    Search & Display Advertising

    • Clear headlines
    • Action-driven CTAs

    Video Advertising

    • Branding in the first 5 seconds
    • Narrative-driven structure

    🎥 Recommended Rich Media:
    Embed a short explainer video titled:
    “Message & Creative Strategy: How to Craft Ads That Convert”


    Frequently Asked Questions

    What is Message & Creative Strategy?
    It is the process of planning advertising communication and creative execution to engage audiences and drive conversions.

    Why is it important?
    It improves clarity, trust, engagement, and advertising ROI.


    Final Thoughts

    A well-defined Message & Creative Strategy plays a critical role in crafting ads that convert. Brands that focus on clarity, creativity, and audience understanding build stronger engagement, achieve better ROI, and create long-term advertising success.

    When messaging and creative execution work together, advertising becomes a powerful growth engine.


  • Getting Started with Asset Management Systems

    Getting Started with Asset Management Systems

    Getting Started with Asset Management Systems in TD Pipeline Development

    Asset Management System in TD Pipeline Development is the backbone of efficient CGI, VFX, animation, and game production pipelines. With global teams and increasing project complexity, an AMS ensures every digital file—models, textures, rigs, or scripts—is properly organized, version-controlled, and accessible to all departments.

    This guide will walk you through the fundamentals of AMS, its importance in TD pipelines, core components, top tools, workflow, and FAQs to get started efficiently.


    What Is an Asset Management System (AMS)?

    An Asset Management System (AMS) is a software or structured framework for storing, organizing, tracking, and distributing all assets in a production pipeline.

    Assets include:

    • 3D models
    • Textures & materials
    • Rigs & animations
    • HDRI maps
    • Scripts & tools
    • Reference files
    • Project documents

    Ensures all teams use the latest approved version.

    Internal link suggestion:

    • Learn more about 3D Asset Management in Animation[Insert internal link]

    Why an Asset Management System in TD Pipeline Development Is Critical

    1. Prevents File Chaos

    Maintains order and reduces duplicates, overwrites, and misplacement.

    2. Improves Team Collaboration

    Synchronizes access for multiple artists working on the same assets.

    3. Enhances Efficiency

    Artists spend more time creating, less searching.

    4. Enables Smooth Version Control

    Tracks every version and allows rollbacks.

    5. Reduces Production Risk

    Backup systems and structured metadata prevent errors.

    6. Supports Workflow Automation

    Automates publishing, approvals, scene assembly, and rendering.

    Internal link suggestion:

    • Explore TD Pipeline Development Tips[Insert internal link]

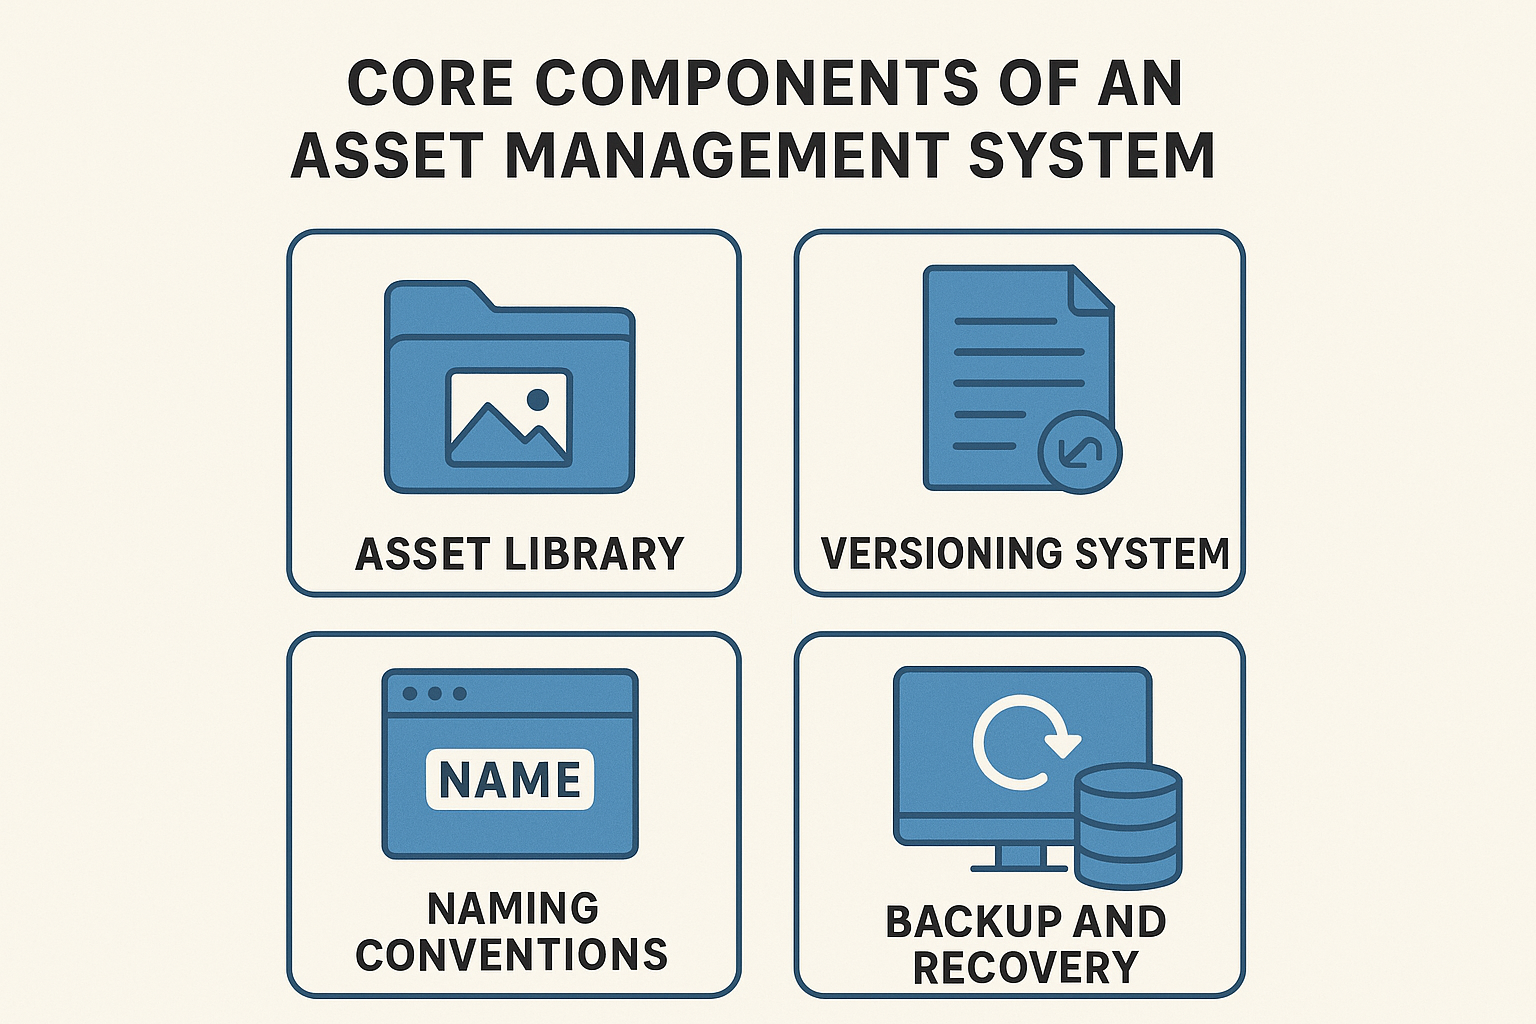
    Core Components of an Asset Management System

    1. Asset Library

    Central storage for all production files.

    Features:

    • Categorized folders: characters, props, FX, sets
    • Metadata tagging
    • Search & filtering
    • Preview thumbnails or 3D turntables

    Rich media suggestion:
    Add a 3D preview or gallery of assets.


    2. Versioning System

    Tracks changes, prevents overwrites, and allows comparisons.

    Example:
    chr_dragon_model_v012.ma

    Internal link suggestion:

    • Read our guide on Version Control Best Practices[Insert internal link]

    3. Naming Conventions

    Standardized naming improves automation and clarity.

    Format: [department]_[assetname]_[task]_[version].[ext]

    Examples:

    • env_palace_texture_v005.exr
    • prop_sword_rig_v008.mb

    4. Backup and Recovery

    Essential for protecting long-term projects.

    Features:

    • Daily automatic backups
    • Cloud mirroring
    • RAID storage
    • Rollback capabilities

    Workflow of Asset Management System in TD Pipelines

    Step 1: Asset Creation (Maya, Blender, Houdini, etc.)
    Step 2: Local Saving + Naming (prop_robotarm_model_wip_v001.ma)
    Step 3: Publish to AMS (upload thumbnail & metadata)
    Step 4: Review & Approval (approve/reject)
    Step 5: Version Updates (prop_robotarm_model_v002)
    Step 6: Pipeline Integration (Layout → Rigging → Animation → FX → Lighting → Rendering)
    Step 7: Backup & Archiving

    Rich media suggestion:
    Create a workflow diagram infographic showing these steps.


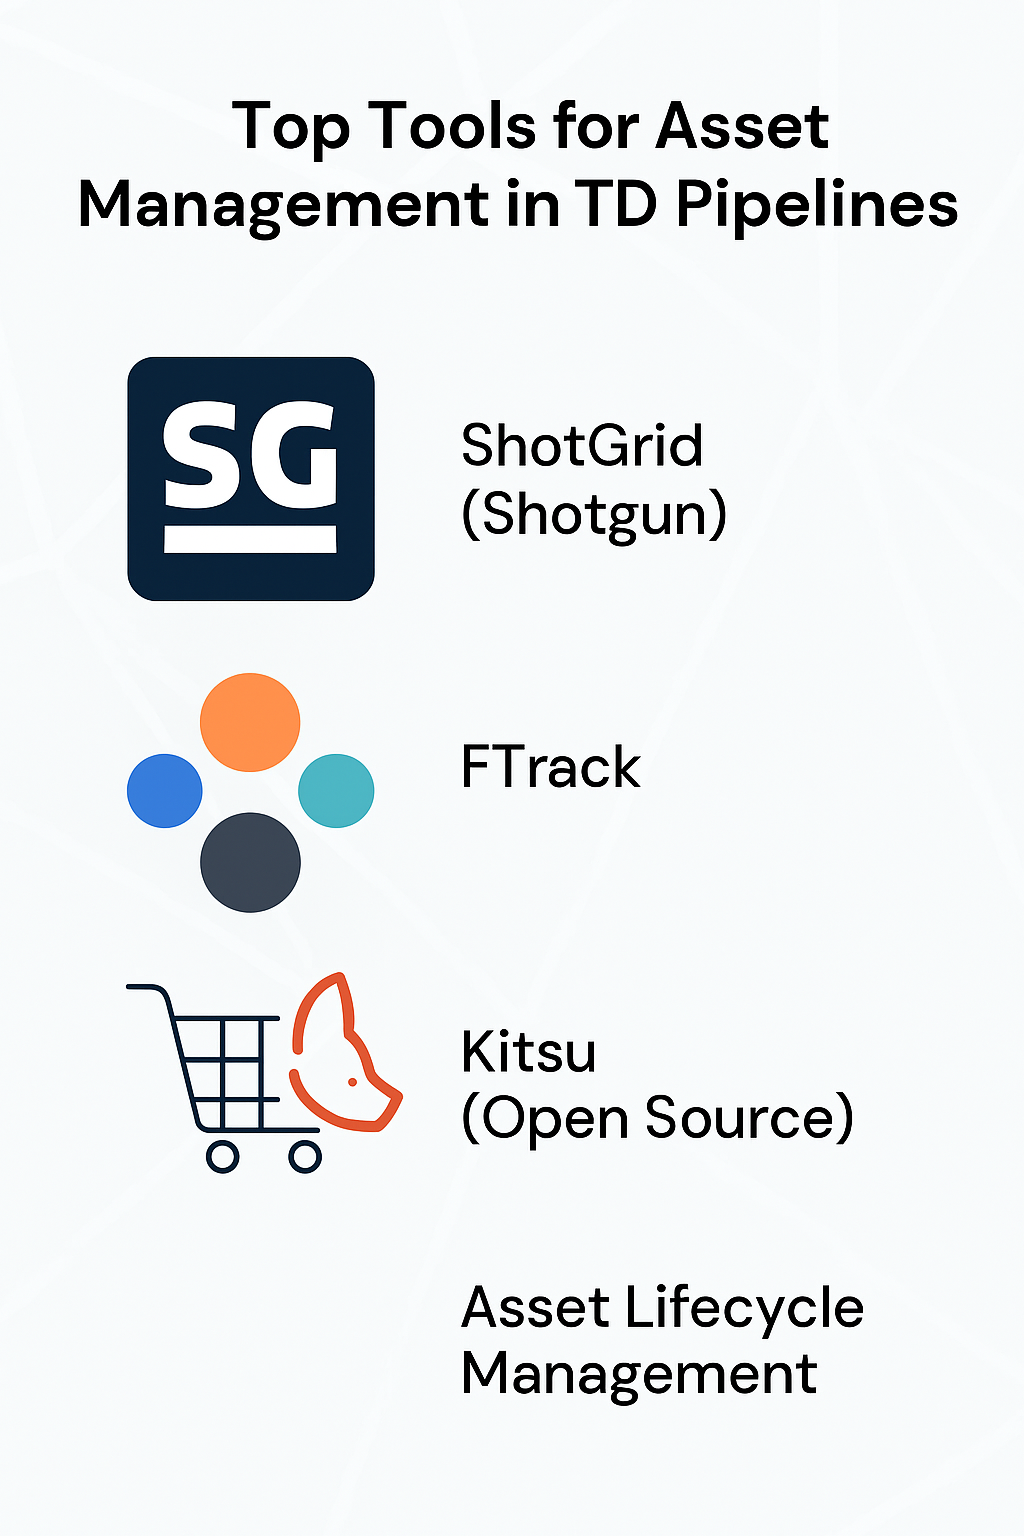
    Top Tools for Asset Management in TD Pipelines

    ShotGrid (Shotgun)

    • Project & asset tracking
    • Task management
    • Review & approval
    • API for automation

    FTrack

    • Real-time dashboards
    • Review tools
    • Task allocation
    • Automation API

    Kitsu (Open Source)

    • Easy UI
    • Real-time feedback
    • Cloud-based
    • Affordable licensing

    Custom Studio AMS

    Used by Pixar (Presto), Disney (Apollo), Weta (Flowline)

    • Deep integration with studio pipelines

    FAQs About Asset Management System in TD Pipeline Development

    1. What is AMS used for?
    Organizes, tracks, and maintains versions of all digital assets.

    2. Why is version control important?
    Prevents overwriting, tracks changes, supports teamwork.

    3. Best tools for beginners?
    Kitsu, FTrack; ShotGrid for advanced users.

    4. Do small studios need AMS?
    Yes, for workflow clarity and error reduction.

    5. Does AMS integrate with Maya/Blender?
    Yes, via APIs and plugins.


    Conclusion

    An Asset Management System in TD Pipeline Development ensures smooth, organized, and efficient production pipelines. With libraries, versioning, naming conventions, backups, and integration with tools like ShotGrid, FTrack, or Kitsu, AMS is essential for every modern VFX, CGI, or game studio.


    Contact

    Phone: +91 99679 40928
    Website: www.aibuzz.net
    Email: info@aibuzz.net


  • 7 Easy Steps for Effective Survey Design for Audience Research

    7 Easy Steps for Effective Survey Design for Audience Research

    Creating a survey design for audience research is crucial for understanding your audience’s preferences, opinions, and motivations. When done correctly, surveys and interviews can provide actionable insights that guide your marketing, product development, and content strategies.

    Here’s a step-by-step guide to creating surveys and interviews that reveal real audience insights.


    Step 1 – Define Clear Research Questions for Survey Design for Audience Research

    Before drafting your questions, define your research objectives. Ask:

    • What specific information do I want from my audience?
    • How will these insights inform my business decisions?

    Example:

    • Research Question: What influences customer loyalty?
    • Hypothesis: Personalized experiences improve customer loyalty.

    Clear research questions help your survey design for audience research remain focused and effective.


    Step 2 – Choose the Right Method Mix for Survey Design for Audience Research

    A combination of quantitative and qualitative research yields richer insights:

    • Online surveys: Capture measurable data such as ratings, preferences, and demographics.
    • 1:1 interviews: Explore why participants think or feel a certain way.

    Tip: Use tools like Google Forms or Typeform and record interviews (with consent) to enhance your survey design for audience research.


    Step 3 – Write Unbiased, Goal-Oriented Questions

    Effective questions are clear, unbiased, and relevant to your research goals.

    • Good question: “How satisfied are you with our service?”
    • Bad question: “Our service is excellent, right?”

    Include closed-ended questions for statistics and open-ended questions for qualitative feedback. Keep surveys short — 8–12 questions for high response rates. This strengthens your survey design for audience research.


    Step 4 – Pilot Test and Refine Your Survey Design for Audience Research

    Pilot testing identifies confusing questions or poor survey flow. Ask 5–10 people to:

    • Check clarity of questions
    • Evaluate the survey flow
    • Assess survey length

    Refining your survey after pilot testing improves completion rates and ensures better-quality data.


    Step 5 – Recruit Representative Participants

    To get accurate insights, select participants that reflect your target audience:

    • Diverse demographics (age, gender, location, profession)
    • Include loyal, new, and inactive users
    • Balanced sampling provides a true reflection of audience opinions

    This step ensures your survey design for audience research produces reliable, actionable insights.


    Step 6 – Conduct Research Ethically

    Ethical practices build trust and credibility:

    • Obtain consent before recording interviews
    • Keep responses anonymous when possible
    • Ask all participants the same core questions

    Following ethics helps ensure consistent, accurate data in your survey design for audience research.


    Step 7 – Analyze Responses and Translate Insights into Recommendations

    • Closed-ended questions: Use percentages, averages, or charts
    • Open-ended questions: Group responses into themes for patterns

    Example: If multiple respondents mention “slow support”, that becomes a key improvement area. Summarize results in a visual report with actionable recommendations, completing your survey design for audience research process.


    Internal Links for Further Reading


    FAQ: Survey Design for Audience Research

    Q1. What is survey design for audience research?
    It’s the process of creating surveys and interviews to understand your audience’s needs, behaviors, and preferences.

    Q2. How many questions are ideal?
    8–12 questions for optimal completion and engagement.

    Q3. How does survey design differ from interviews?
    Surveys collect structured data from many people; interviews provide in-depth insights from fewer participants.

    Q4. Why is pilot testing important?
    Pilot testing helps refine your survey, ensuring clarity, relevance, and better completion rates.

    Q5. How do I analyze open-ended responses?
    Group similar responses into themes to identify patterns. Use tools like Excel or AI-assisted text analysis for efficiency.


    Conclusion

    A well-planned survey design for audience research uncovers genuine audience insights, enabling data-driven decisions. By following these 7 steps, you can confidently create surveys and interviews that reveal what truly matters to your audience.

    Call to Action

    Need expert help with survey design for audience research? Visit Aibuzz.net for professional research and analytics services.


    Rich Media Suggestions:

    1. Cover Image: “7 Steps for Survey Design for Audience Research” – Alt text: Survey design for audience research
    2. Topic Graphic: Infographic of the 7-step survey process
    3. Charts/Graphs: Bar chart or pie chart showing survey results
  • How to Make Buyer Personas: Step-by-Step Guide to Understand Your Audience

    How to Make Buyer Personas: Step-by-Step Guide to Understand Your Audience

    If you want your marketing to truly connect with people, you must first understand who your customers are — what drives them, what challenges them, and how they make decisions. The best way to achieve this is by learning how to make buyer personas that reflect real customer insights.

    A well-crafted buyer persona helps you create targeted campaigns, personalized messages, and products that resonate. In this detailed guide, we’ll show you how to make buyer personas step by step, combining both research and analytics.


    Step 1: Define Persona Goals

    Before diving into research, define the purpose of your buyer personas. Ask:

    • What decisions will these personas guide?
    • Will they influence marketing campaigns, sales messaging, or product design?

    For example, an eCommerce business may use buyer personas to identify which customer segments respond best to seasonal promotions. A clear objective ensures your research stays focused and effective.

    For deeper strategy guidance, check out HubSpot’s Buyer Persona Resource


    Step 2: Collect Qualitative Data

    Qualitative data gives you real-world insight into customer motivations. Use these methods:

    • Customer interviews: Talk to customers directly to learn about their goals and frustrations.
    • Support tickets: Review frequently asked questions to identify recurring pain points.
    • User testing sessions: Observe how people interact with your product or website.

    Qualitative research helps uncover why customers behave a certain way — a vital step in building authentic buyer personas.


    Step 3: Collect Quantitative Signals

    Once you have qualitative insights, back them up with quantitative data to validate your findings.

    Use analytics tools like:

    • Google Analytics: Identify high-performing content and audience demographics.
    • CRM data: Review customer segments, purchase history, and churn patterns.
    • Email and ad analytics: Track open rates, conversions, and engagement levels.

    These numerical patterns confirm which trends and behaviors are consistent across your audience.

    Explore more about analytics at Google Analytics Academy


    Step 4: Identify Patterns and Group Insights

    Analyze your research data and look for patterns that link customers together:

    • Goals: What outcomes are they trying to achieve?
    • Pain Points: What barriers stop them from success?
    • Preferred Channels: Where do they spend their time — LinkedIn, Instagram, or YouTube?
    • Buying Triggers: What prompts them to make a purchase — discounts, urgency, or peer influence?

    Grouping customers based on these factors helps you form clear audience segments that will become your buyer personas.


    Step 5: Draft Persona Templates

    Now bring your research to life by creating detailed persona profiles. Each persona should include:

    • Name and Role: Example – “Tech-Savvy Tara,” a digital marketing manager.
    • Demographics: Age, gender, income, and location.
    • Goals and Aspirations: What success looks like for them.
    • Pain Points: The struggles they face daily.
    • Preferred Communication Channels: Email, social media, or chat support.
    • Common Objections: Why they might hesitate to buy.

    Give your persona a photo and background story to make them relatable and realistic.

    Try HubSpot’s Free Persona Generator Tool to easily design your personas.


    Step 6: Validate Personas with Real Customers

    Never assume your personas are correct without validation.

    To confirm accuracy:

    • Get feedback from sales, marketing, and support teams who interact with customers daily.
    • Test your personas with targeted campaigns to see if your messages resonate.
    • Conduct short follow-up surveys or interviews to verify assumptions.

    Validation helps refine your personas, making them more accurate and reliable for future decisions.


    Step 7: Create Messaging and Content for Each Persona

    Once validated, align your marketing strategies to each persona’s needs:

    • Messaging: Tailor your tone, words, and offers for each customer group.
    • Content Strategy: Create blog posts, guides, and videos that speak to their challenges.
    • Ad Targeting: Use personas to define audience filters for paid campaigns.

    Example: “Startup Steve” might respond to budget-friendly solutions, while “Executive Emma” values premium service and ROI-focused content.

    Learn more about persona-driven content at Content Marketing Institute


    Step 8: Keep Personas Updated and Evolving

    Buyer personas are not static documents. Consumer behavior evolves with market trends, technology, and culture.

    Review and refresh your personas every 6–12 months, considering:

    • New product launches
    • Customer feedback and survey data
    • Emerging digital platforms

    Keeping personas up to date ensures your marketing stays relevant and competitive.


    Why Learning How to Make Buyer Personas Matters

    Knowing how to make buyer personas empowers your team to connect emotionally with your audience.

    Benefits include:

    • Creating personalized customer experiences
    • Improving ad targeting and conversion rates
    • Streamlining communication across departments
    • Reducing wasted marketing spend

    When your entire organization understands who they’re speaking to, every campaign feels more human and authentic.


    Final Thoughts

    Building strong buyer personas isn’t just a marketing task — it’s a growth strategy. By learning how to make buyer personas, you’re essentially learning how to connect with real people behind every click, view, and purchase.

    Invest time in collecting data, validating insights, and updating personas regularly. The result? Better campaigns, higher conversions, and a deeper connection with your audience.


    Frequently Asked Questions (FAQs)

    1. What is a buyer persona?

    A buyer persona is a detailed, research-based profile that represents your ideal customer’s demographics, motivations, and purchasing behaviors.

    2. Why is it important to know how to make buyer personas?

    Because accurate personas help improve your content strategy, marketing precision, and overall customer satisfaction.

    3. How many personas should a business have?

    Most companies start with 2–4 main personas to cover their key audience segments.

    4. How often should personas be updated?

    Ideally every 6–12 months, or whenever your business or audience undergoes major changes.

    5. What tools help in creating buyer personas?

    Try tools like HubSpot’s Persona Generator, Google Analytics, or Typeform for surveys and data collection.


    Call to Action:
    Ready to understand your customers deeply and drive smarter marketing? Start building your personas today — use real data, validate insights, and keep them evolving with your business growth.

    Contact:- 919967940928
    Visit:- www.aibuzz.net
    Mail us:- info@aibuzz.net

  • Competitor & Market Gap Analysis: A Step-by-Step Framework

    Competitor & Market Gap Analysis: A Step-by-Step Framework

    Performing competitor analysis for market positioning is critical for any business that wants to succeed in a crowded market. It helps uncover opportunities, identify gaps in the industry, and refine your brand’s unique value proposition. By analyzing competitors systematically, you can make smarter decisions and create strategies that set your business apart. In this guide, we’ll take you through a step-by-step framework for conducting a comprehensive competitor and market gap analysis that strengthens your positioning and boosts growth.


    Why Competitor Analysis is Key for Market Positioning

    Understanding your competitors is not just about knowing their names—it’s about decoding their strategies. A well-executed competitor analysis for market positioning enables you to:

    • Identify competitor strengths and weaknesses
    • Discover underserved market segments
    • Benchmark pricing, features, and services
    • Improve your brand positioning to attract the right customers

     For related insights on leveraging technology, check out Artificial Intelligence Services.


    Step 1: Define Direct and Indirect Competitors

    Start by clearly identifying your competitors:

    • Direct Competitors: Businesses offering similar products or services to your target audience
    • Indirect Competitors: Companies addressing the same customer needs in different ways

    For example, Netflix and Disney+ are direct competitors, while YouTube is an indirect competitor in video streaming. For insights on tech-driven growth, see IT & Tech Services.


    Step 2: Collect Publicly Available Data

    The next step in competitor analysis for market positioning is gathering publicly available data. Key sources include:

    • Websites & Landing Pages: Study features, offers, and messaging
    • Pricing Models: Understand affordability and premium positioning
    • Customer Reviews: Learn what customers like and dislike
    • Social Media: Observe engagement, content, and tone

    Tools like SEMrush, Ahrefs, SimilarWeb, and Google Alerts can provide valuable insights.

    Learn more about data-driven analysis in Analytics in Cloud Computing.


    Step 3: Benchmark Offerings

    Compare competitors based on:

    • Features: Identify what they offer and what’s missing
    • Pricing: Determine budget vs premium positioning
    • UX/UI: Assess ease of use and design appeal
    • Customer Service: Evaluate responsiveness and support quality

    Benchmarking shows where you can differentiate your product or service. Explore advanced insights in Big Data Analytics in Cloud Computing.


    Step 4: Conduct SWOT Analysis

    Perform a SWOT analysis for each competitor:

    • Strengths: What they excel at
    • Weaknesses: Where they fall short
    • Opportunities: Trends they haven’t explored
    • Threats: External challenges or new entrants

    This helps you identify strategic gaps and areas where your brand can stand out. For more industry trends, see Trending Technologies in Software Development.


    Step 5: Map Competitor Positioning

    A perceptual map visually represents how competitors are perceived, typically using attributes like price and quality. Steps to create one:

    1. Select two key attributes for comparison
    2. Plot competitors on the map
    3. Identify empty spaces, which represent market gaps

     For visual analysis insights, check Big Data Analytics in Cloud Computing.


    Step 6: Identify Market Gaps

    Analyze the perceptual map to discover areas where competitors fail to meet customer needs:

    • Missing features
    • Neglected audience segments
    • Poor UX or pricing options

    Filling these gaps positions your brand as the preferred solution for customers.


    Step 7: Recommend Positioning and Marketing Moves

    Based on the analysis, refine your positioning strategy:

    • Develop a clear unique value proposition (UVP)
    • Adjust pricing to align with perceived value
    • Highlight differentiators in all marketing campaigns
    • Use storytelling to create emotional connections

    Example: If competitors are overly complex, your brand can emphasize simplicity and ease-of-use. For marketing-focused strategies, visit IT & Tech Services.


    Step 8: Monitor and Update Quarterly

    Markets evolve, so continuous monitoring is crucial:

    • Update competitor data every quarter
    • Track new launches and marketing campaigns
    • Reassess perceptual maps and SWOT analyses

    This ensures your competitor analysis for market positioning remains accurate and actionable.


    Conclusion

    A thorough competitor analysis for market positioning equips businesses to identify opportunities, fill market gaps, and strengthen their brand. By following this structured 8-step framework, you can position your business strategically, differentiate effectively, and drive sustainable growth.

     For more innovation insights, read Trending Technologies in Software Development.


    FAQs

    1. What is competitor analysis for market positioning?
    It is the process of analyzing competitors’ strategies, products, and services to find opportunities for your brand to stand out.

    2. Why perform competitor analysis regularly?
    Quarterly reviews help your business stay ahead of market changes and competitor moves.

    3. Which tools are best for competitor analysis?
    Tools like Ahrefs, SEMrush, Google Alerts, and SimilarWeb provide actionable insights.

    4. What is a market gap?
    A market gap is an unmet need that competitors haven’t addressed, offering your brand an opportunity to fill it.

    5. How does competitor analysis improve marketing strategies?
    It helps align content, pricing, and campaigns with what customers value while differentiating from competitors.


    Call to Action

    Boost your market positioning with data-driven insights! Partner with Aibuzz.net for AI, analytics, and digital strategies that put your business ahead of competitors.

  • Audience Segmentation: Step-by-Step to Find Your Ideal Customer

    Audience Segmentation: Step-by-Step to Find Your Ideal Customer


    In today’s competitive digital landscape, mastering the audience segmentation steps is essential for marketing success. Understanding your customers is no longer a luxury—it’s a necessity.

    Audience segmentation allows businesses to divide a broad customer base into smaller, more meaningful groups. This process helps marketers deliver personalized messages, increase engagement, and drive higher conversions.

    Let’s explore the step-by-step process of audience segmentation that helps you find your ideal customers and create impactful marketing campaigns.


    Step 1: Start with Clear Business Goals

    The first step in any segmentation strategy is to define your business goals. Ask yourself:

    • Who generates the most value for my business?
    • What are my main marketing objectives—brand awareness, lead generation, or customer retention?

    Setting clear goals ensures that your segmentation efforts align with your organization’s growth strategy.

    For example, a SaaS company might segment users by subscription tier or product usage, while an eCommerce brand could target repeat customers who bring higher order value.

    Pro Tip: Always align your segmentation objectives with your business KPIs. This ensures your campaigns focus on the most profitable customer groups.


    Step 2: Gather Data from Multiple Sources

    The second step in the audience segmentation process is data collection. You need rich and diverse data to understand your customers’ behaviors and preferences.

    Gather information from:

    • CRM Systems: Reveal relationship history and purchase data.
    • Web Analytics Tools: Show user behaviors—time spent, page views, and clicks.
    • Transaction Logs: Identify purchasing frequency and monetary value.
    • Customer Surveys: Highlight needs, satisfaction, and opinions.
    • Social Media Insights: Offer real-time data on audience engagement and interests.

    When you combine these data sources, you gain a 360-degree customer view—a key foundation for precise segmentation.

    External Resource: Learn more about using analytics in segmentation on HubSpot’s Audience Segmentation Guide.


    Step 3: Select Segmentation Criteria

    Once data is gathered, the next step is to choose segmentation criteria—the factors that will divide your audience into distinct groups.

    1. Demographic Segmentation

    Groups customers by age, gender, income, education, or occupation.
    Example: Target millennials for app-based services or professionals for premium plans.

    2. Geographic Segmentation

    Segments based on country, region, or climate.
    Example: Promote winter apparel in colder regions.

    3. Psychographic Segmentation

    Focuses on lifestyles, opinions, values, and interests.
    Example: Offer eco-friendly products to sustainability-focused buyers.

    4. Behavioral Segmentation

    Uses data on purchasing habits, product usage, and loyalty.
    Example: Send reward offers to frequent buyers or reactivation campaigns to inactive users.

    Selecting the right segmentation criteria ensures that your marketing messages truly resonate with your audience.

    Internal Resource: Check our detailed guide on How to Conduct Effective Market Research to improve your data accuracy.


    Step 4: Use Clustering Methods or Rules

    After defining criteria, start grouping your audience using either manual methods or data-driven algorithms.

    Manual Tagging

    Ideal for small businesses—label customers in your CRM as “loyal buyers,” “new leads,” or “inactive users.”

    RFM Analysis (Recency, Frequency, Monetary)

    A proven model that segments customers based on how recently and frequently they purchase and how much they spend.

    K-Means Clustering

    A machine learning technique that automatically groups customers with similar behaviors.

    Whether you’re using manual tags or AI-powered clustering, the goal is to form meaningful customer groups that represent real patterns, not random data.


    Step 5: Build Segment Profiles and Prioritize

    Once your audience is divided, develop segment profiles or buyer personas. Each profile should describe:

    • Demographics: Age, gender, occupation, location.
    • Psychographics: Lifestyle, interests, and pain points.
    • Behavioral Insights: Purchase frequency, preferred communication channel, and product usage.

    For example:

    • Segment A: Loyal buyers who purchase premium items.
    • Segment B: Price-sensitive new visitors seeking discounts.

    Then, prioritize segments that offer the highest potential ROI or growth opportunities. Focus your marketing efforts where they’ll make the greatest impact.


    Step 6: Create Tailored Messaging and Channel Strategy

    This is where segmentation meets creativity. Design personalized messages for each audience group.

    Examples:

    • For new customers, send welcome offers or educational content.
    • For loyal customers, give exclusive previews or reward points.
    • For inactive users, share re-engagement emails or limited-time discounts.

    Also, select the right communication channel for each group.
    Gen Z may engage more on Instagram or TikTok, while professionals prefer LinkedIn or email campaigns.

    Personalized content delivered on the right platform can boost engagement by over 60% (source: Statista).


    Step 7: Test and Measure Performance

    Before launching full-scale campaigns, test your segmentation strategy using A/B tests or pilot campaigns.

    Try variations in:

    • Content and tone
    • CTA placement
    • Message timing
    • Marketing channels

    Then, evaluate performance using metrics such as open rates, CTRs, conversion rates, and ROI.

    Testing ensures your audience segmentation steps are actually producing results and driving conversions.


    Step 8: Refine and Update Segments

    The final step is to continuously refine your audience segments. Customer behavior changes with time, so your segmentation strategy must adapt too.

    Revisit your data to identify:

    • New trends or customer behaviors
    • Underperforming segments
    • Emerging needs

    Regular refinement ensures your marketing remains relevant, data-driven, and effective.


    Why Audience Segmentation Matters

    Implementing the right audience segmentation steps provides long-term benefits:

    • Improved Marketing ROI: Spend smarter by targeting the right audience.
    • Higher Engagement: Personalized messages resonate more effectively.
    • Customer Retention: Build loyalty through tailored communication.
    • Smarter Product Development: Understand customer needs better.

    Audience segmentation transforms your marketing from guesswork into a strategic, insight-driven process.


    Conclusion

    Following these audience segmentation steps is the key to building deeper customer relationships and achieving marketing excellence.

    By setting clear goals, gathering reliable data, and refining your strategies through testing, you can turn customer insights into measurable growth.

    Start understanding your audience today—and let data guide every marketing decision you make.


    FAQs About Audience Segmentation Steps

    1. What is audience segmentation in marketing?

    Audience segmentation is the process of dividing your target market into smaller, specific groups based on demographics, interests, or behavior for personalized marketing.

    2. Why is audience segmentation important?

    It helps deliver more relevant messages, increase engagement, and optimize marketing resources for maximum ROI.

    3. How many segments should a business have?

    Most companies work effectively with 3–7 well-defined segments depending on business goals and data size.

    4. What tools can help with segmentation?

    You can use Google Analytics, HubSpot, Salesforce, or Mailchimp to collect and segment audience data.

    5. How often should audience segments be updated?

    Review and refine your segmentation every 6–12 months or when market conditions change.


    Call to Action:

    Ready to identify your ideal customers and boost conversions?
    Contact AIBuzz.net today for expert audience segmentation and data-driven marketing strategies that deliver measurable success.